#LowCarbRecipe: Pork and Green Chile Stew, Revisited

Can you believe it? A recipe post from me! It’s been so long. But there’s a reason why the kitchen is the first room I’ve concentrated on during the 31-Day Clean House Challenge. Because for me, a clean, organized kitchen not only makes meal planning and prep easier, it’s an open invitation to cook. And as part of that challenge, I cleaned out the freezer the other day and realized I had several packets of frozen, shredded pork roast that I needed to use soon.

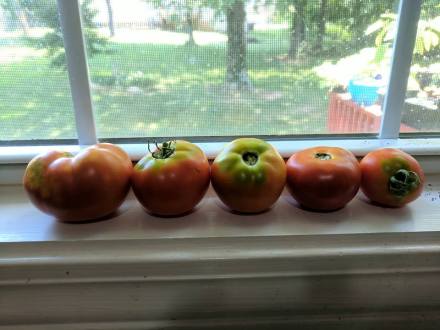
I also had several small fresh tomatoes from the container garden I’m cultivating on my back deck.

And I recently opened a jar of roasted green chile that I need to either use or freeze soon, before it goes bad.

Pork and Green Chile Stew II
Here’s the original recipe for a version of this. I made a lot more of it this time!

Ingredients:

  • 32 oz (4 cups) beef or pork broth (I used beef, since that’s what I already had) = 0 net carbs
  • Approx. 2 cups shredded pork roast–because this was cooked with onion, I counted 2 carbs per cup = 4 net carbs
  • 1/4 to 1/2 cup chopped roasted Hatch green chile–depends on how spicy you want it (I like it spicy). The 505 brand is 3 carbs per 2 tablespoons, so 1/2 cup = 12 net carbs
  • 1 cup skinned, diced tomato = 5 net carbs
  • 1 tablespoon dried oregano = 1 net carb
    16 net carbs total for the above recipe
  • Other herbs/spices and/or veggies as desired (don’t forget to calculate for additional carbs)

Instructions:
In a large pot over medium-high heat, add broth and meat and bring to a boil. (My meat was frozen, so I set it on a lower temperature and covered it and let it cook away for a half hour or so until the meat was heated through. If your meat isn’t frozen, this shouldn’t take long, since the meat is already cooked.)

Add chiles, tomatoes, oregano, and other seasonings if desired, return to a boil. Reduce heat to low and let simmer at least 30 minutes, up to a few hours, before serving.

This recipe makes four (5.5 carbs) to six (3.6 carbs) dinner-size servings.
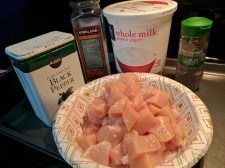
Posted in Food Journal, Low-Carb, Recipes | Tagged , , , , , , , | 2 Comments

#LowCarb #Recipe: Chicken Tikka Masala Stuffed Peppers

In the last year or two, I’ve developed an addiction to chicken Tikka Masala. And while I can get a decent canned version of the sauce at Kroger (no sugar added!), I’ve been wanting to make it at home. So this gives me a perfect option and I don’t feel deprived of the naan that I usually sop up the extra sauce with.

Chicken Tikka Masala Stuffed Peppers
Click here for a printable PDF version.
Ingredients:

  • 1 lb. chicken boneless/skinless chicken breasts, cubed
  • 1/2 cup yogurt (Greek preferred)
  • 1 generous teaspoon garam masala seasoning*
  • 1/2 teaspoon salt
  • 1/2 teaspoon ground black pepper
  • 1 tablespoon olive oil
  • 4 tablespoons butter, divided (1 + 3)
  • 1 small onion, diced (or 1 cup prepared chopped onion—thawed and drained if frozen)
  • 1 tablespoon minced or grated ginger (1.5 tsp. dry ground ginger)
  • 2 cloves garlic, minced (2–3 tsp.)
  • 1 14.5-ounce can crushed or pureed tomatoes
  • 1/2 to 2/3 cup tomato sauce (to taste)
  • 1 heaping tablespoon garam masala seasoning
  • 1/2 teaspoon cayenne pepper (more or less to taste)
  • 1/2 to 3/4 cup heavy cream or canned coconut milk
  • 1½ cups cauliflower rice**
  • 3 or 4 large bell peppers, topped and seeded

Tools & Utensils:

  • Knife, cutting board
  • Measuring cup/spoons
  • Gallon-size zip-top plastic bag
  • Strainer/colander
  • Large tall-sided skillet or saucepan
  • Bowl to hold chicken when cooked
  • Slotted spoon

Instructions:

    Marinate Chicken Ahead of Time:
    In the zip-top bag, combine the chicken, yogurt, teaspoon garam masala seasoning, salt, and pepper. Seal bag and smoosh around until seasonings and yogurt are well mixed and chicken is thoroughly coated. Marinate at least 30 minutes to overnight.

Preheat oven to 350°F.

  1. Pour marinated chicken through colander to remove as much of the yogurt as possible.
  2. In large skillet or saucepan over medium-high heat, heat olive oil plus 1 tablespoon butter. Add chicken and sauté until just cooked through.
  3. Remove chicken to bowl and set aside.
  4. Add remaining 3 tablespoons butter to pan (still over medium-high heat). As soon as it is melted and starting to bubble just a bit, add onions and ginger. Sauté until onions are softened.
  5. Add garlic and sauté 1 minute, until fragrant.
  6. Return chicken to pan and add tomatoes and tomato sauce, 1 tablespoon garam masala seasoning, and cayenne pepper and bring to a boil.
  7. Reduce heat, cover, and simmer 10 to 15 minutes.
  8. Add 1/2 cup cream/coconut milk and return to a slow simmer. If sauce is too thick, add additional 1/4 cup cream/coconut milk OR tomato sauce. Remove from heat and stir in cauliflower rice. Taste and re-season if necessary.
  9. Arrange prepared peppers in a baking dish just large enough to hold them all standing upright (9×9- or 9×13-inch with tall sides will probably work well for four large peppers). Using a slotted spoon, fill each pepper with tikka masala. If desired, pour any remaining tikka masala sauce over peppers/into baking dish.
  10. Bake 30 to 40 minutes, or until peppers are cooked through but not mushy.


*I purchased ready-made garam masala—be sure to look for a mixture that doesn’t include paprika. You can find a recipe to make your own mixture at All Recipes.

**You can buy the already “riced” cauliflower, or you can make your own using fresh (not frozen/thawed) cauliflower and a box grater or a food processor. If you use a food processor, be careful to pulse it until it’s in “granules” and not mush! One pound of fresh cauliflower should yield approximately 4 cups of “rice.” I made my own:

I have a stick blender that came with a small “food processor” attachment, which was perfect for this.

You may end up with uneven sized pieces, but mine cooked down enough that it was hard to tell it was there anyway.

Posted in Healthy Eating Guidelines, Low-Carb, My Wholesome 30, Recipes, Whole30 | Tagged , , , , , | 1 Comment

#LowCarb #Recipe: Orange-Lime Marinated Salmon

As mentioned in my previous post, I’m trying to follow the Activate cycle of the 17-Day Diet (visit that post to find out more about it). Which means finding new and tasty ways to make poultry and fish dishes, since those are the only meats allowed during this cycle. As I’m not really a big fan of fish (other than salmon, catfish, and tilapia), I’ve been trying to think of ways to make it that aren’t difficult and that are very tasty. Which led me to thinking about the marinades I’ve done here on the blog. One of my favorite was Orange-Lime Pork Chops, and I thought I could adapt it for salmon. And, boy howdy, was I right!

Orange-Lime Marinated Salmon
Click here for a printable PDF version.

Ingredients:

  • Juice of one small orange (approx. 1/2 cup)
  • Juice of one lime (approx. 1/4 cup)
  • 1 to 2 tablespoons minced garlic
  • 2 tablespoons olive oil, plus more for cooking
  • 2 teaspoons dry cilantro
  • 1/2 teaspoon kosher salt
  • 1/2 teaspoon ground black pepper
  • Up to 2 lbs. salmon fillets

Tools & Utensils:

  • Measuring cup/spoons
  • Small bowl for mixing marinade
  • Citrus juicer (optional—I used my hands and the handle of a wooden spoon)
  • Gallon-size zip-top plastic bag
  • Paper towels
  • Medium to large heavy-bottom skillet
  • Flexible (fish) spatula

Instructions:
Combine orange juice, lime juice, and olive oil in plastic bag. Add salmon fillets. Remove as much air as possible, seal, and then gently smoosh around until the fillets are completely covered with the marinade. Marinate 30 to 60 minutes at room temperature, turning the bag at least once. (I set a timer for 30 minutes, then turned the bag; I then prepared the cauliflower and zucchini for roasting. By the time those were ready to go into the oven for 10-15 minutes, the hour was nearly up for the marinating and it was time to cook the salmon).

Remove salmon fillets from bag and blot skin side with paper towels.

Drizzle oil in skillet and heat skillet over medium heat for 3 minutes, or until oil shimmers. Add one fillet to pan, skin-side down. Press fillet down lightly with flexible (fish) spatula for 10 seconds to keep fillet from buckling. Repeat with remaining fillet(s). Cook approximately 3 minutes, until flesh on sides turns from translucent to opaque most of the way up the sides. Flip fillets and cook no longer than 30 to 60 seconds on flesh side before removing from pan. Or, according to Bon Appetit:

Want a super-casual way to know if the fish is cooked through? Give the sides a squeeze. If it’s finished, the flakes will begin to separate, since the fat between them is rendered. It’s kind of like you’re hugging your salmon. It’s kind of like you love it. And to be honest, you should. You just cooked it perfectly.

Because I knew I’d be eating one of my two fillets for another meal, I only cooked it on the skin side for two and a half minutes and the flesh side for thirty seconds, so that it wouldn’t be overdone when reheated. But I like my salmon on the medium-rare side of just cooked through.

Don’t be concerned if the skin of the salmon looks burned when you flip it. The juices will make it caramelize darker than you’d think. Even though mine looked blackened, it didn’t taste that way. The skin was perfectly crisp and tasty.

You may want to reserve a couple of slices of lime to garnish your plates and squeeze over your salmon before eating—but I liked them just the way they came out with nothing more added.

Posted in Journal, Low-Carb, My Wholesome 30, Recipes | Tagged , , , , | Comments Off on #LowCarb #Recipe: Orange-Lime Marinated Salmon

#17Day “Activate” #LowCarb Kickstart for 2018

I started the 17-Day Diet “Activate” cycle today in order to kick-start my low-carb eating for 2018. If you’re not familiar, you can learn the basics of the plan on the 17-Day Diet Blog (which includes the Cycle 1/”Activate” food lists), or pick up the book.

I usually eat sausage (pork) for breakfast, so I wanted something to simulate that to enable me to stick to this. So I had the idea to make my Most Delicious Meatballs in the World with ground chicken. The mixture was much harder to work with than when made with beef and pork, but they turned out SO GOOD it was hard to eat only one 4-ounce “sausage” this morning!

(No, Parmesan cheese is not on the food list for Cycle 1 of the 17-day diet—but it’s half a cup divided by nine quarter-pound meatballs; and the ground chicken, being so lean, needs the Parmesan for the binder as it cooks to keep the meatballs from disintegrating. If half a cup of cheese keeps me on track, I’m making that allowance!)

Okay, you caught me—I couldn’t wait to dig in to one of these, not even the few seconds that it takes to snap a photo. With two pounds of chicken and all the other ingredients, it made nine almost perfectly four-ounce meatballs (about 4.02 to 4.06 according to my food scale).

Posted in Food Journal, Journal, Low-Carb | 1 Comment

Quick #LowCarbRecipe: Jalapeno Popper Dip

Sorry this blog has been so quiet . . . I’m planning to spend some time over the winter holidays putting together a (very ambitious, I’m sure) plan of a mix of new recipes to share and old recipes to re-try/revamp starting in 2017.

Here’s a great hot dip recipe for potlucks and finger-food parties. This stuff is yummy on pretty much everything (veggies, meat, etc.).

Jalapeno Popper Dip Recipe
Click here for a printable PDF of this recipe.

Ingredients:

  • 8 oz. cream cheese, softened
  • 1/4 cup mayonnaise
  • 6 to 8 small- to medium-sized jalapenos, seeded, membrane removed, finely chopped (to taste*)
  • 3 to 4 ounces cooked chopped bacon/bacon bits
  • 1 cup grated sharp cheddar

Tools & Utensils:

  • Medium bowl
  • Mixing spoon/spatula
  • 8 x 8-inch (or equivalent volume) baking dish
  • Knife, cutting board
  • Measuring cups

Instructions:
Preheat oven to 400°F.

In a medium bowl, whip together cream cheese and mayo until well combined. Stir in jalapenos, bacon, and cheddar. Spread evenly in baking dish. Bake 20 minutes, or until bubbly and top starts turning golden brown. Let sit/cool about 5 to 10 minutes before serving. Serve warm.

*Cooking will mellow the heat of the jalapenos slightly, so it may not be quite as spicy coming out as it is going in. For Christmas, if you want to add red in with it but can’t find red jalapenos, you can always add red bell pepper. I did this in the toaster oven, and it turned out perfectly at the same temperature and time for cooking.
20161215_194657

Posted in Low-Carb, My Wholesome 30, Recipes | Comments Off on Quick #LowCarbRecipe: Jalapeno Popper Dip

#LowCarbRecipe: Semi-Homemade Pickles (a review)

In case you missed it, on Saturday, I posted #LowCarbRecipe: What Can I Do with All That Leftover Pickle/Pepper Juice?, a recipe for making use of the leftover liquid in pickle and pepper jars after the pickles and peppers are gone.

As promised, this is my follow-up post now that they’ve had a few days to pickle.

Let’s put it this way . . . I’m already eyeing another bottle of pepproncini to see how long it’s going to take me to finish those off so I can make more of these yummy, yummy pickles! (Or how long it’ll take me to finish off these pickles so I can just add more cucumbers to this jar.)

Definitely worth trying!!!

#LowCarbRecipe: Semi-Homemade Pickles | LowCarbKaye.com

Posted in Low-Carb, Recipes | 2 Comments

#LowCarbRecipe: What Can I Do with All That Leftover Pickle/Pepper Juice?

Yes, I’m still here!!! I know it’s been months since I’ve posted on this blog, but I’m hoping to get started up again here soon. As I’ve mentioned before, I struggle with depression—and now that I’m on a medication for my psoriasis that exacerbates symptoms of depression, I’ve been struggling more than ever. The good thing, though, is that both the medication for the psoriasis and the anti-depressant I’m on to try to balance me out both have “loss of appetite” as a major side effect. And I’ve experienced that to the effect of about fifty pounds lost in the last eight months. However, rather than being a passive participant, I’m ready to start actively controlling my nutrition to make sure that I’m making healthy choices, not just losing weight in an unhealthy manner (because I’m allowing myself to eat whatever I want because I know I don’t eat enough during the day to get in a healthy amount of calories).

What Does That Have to Do with Leftover Pickle/Pepper Juice?
Nothing whatsoever. 🙂

Last week, there was a piece on Mental Floss enumerating several things that you can do with the juice that’s left over after you eat all of the pickles from a jar. (12 Uses for Pickle Juice.) One of the main suggestions is to slice fresh veggies and put them in the juice to pickle.

Because pickles are one of my go-to low-carb snacks—and because I and many others in my family are pickle addicts from childhood, I posted it to my Facebook wall. And we got into throwing around some ideas of things we can do with our leftover juice. I happened to mention that I also like to snack on Pepperoncini peppers and in addition to using the leftover (spicy) juice from those to dress greens with (spinach, turnip greens, mustard greens, etc.), I might try using it for pickling other veggies, too.

Well, today, I found myself with half of a 32-ounce jar of leftover pepproncini juice, while I still have some left from a previous jar to use for greens. So I decided it was time to put it to work.

#LowCarbRecipe: What Can I Do with All That Leftover Pickle/Pepper Juice? | LowCarbKaye.com

Ingredients:

  • Approx 16. oz. leftover pepperoncini juice in original (32 oz.) jar
  • 1 tbsp. minced garlic (fresh or from jar)
  • 2 tsp. dried dill weed
  • 1 tsp. dried dill seed
  • 2 tsp. kosher salt
  • 8 to 12 mini (salad) cucumbers, sliced—enough to mostly fill jar
  • white vinegar—enough to fill/top-off jar (I probably needed 1/2 to 3/4 cup)

Tools/Utensils Needed:

  • knife
  • mandoline, with blade set to thicker slice width
  • measuring spoons

Directions:
Add garlic, dill weed, dill seed, and salt to juice in pepper jar. Make sure lid is sealed tightly and then shake vigorously to combine. Set aside.

Use knife to cut off non-stem end of cucumber. Slice using knife or mandoline into approx. 1/4-inch-thick rounds. Add slices to jar. Keep adding cucumbers to jar until only about 1″ of juice remains unfilled at the bottom of the jar. Fill jar almost to top of rim with vinegar. Again, make sure lid is secured tightly and then shake vigorously to ensure even distribution of cucumbers, herbs, and spices.

Store in fridge 1 to 2 days. Gently shake jar occasionally to keep everything stirred up. Pickles should then be ready to eat.

Now, because I’ve just done the “put it together” part of this recipe, I don’t know for sure how they’ll turn out. I’ll check back in several days with a follow up.

#LowCarbRecipe: What Can I Do with All That Leftover Pickle/Pepper Juice? | LowCarbKaye.com

Posted in Food Journal, Low-Carb, Recipes | 1 Comment

#LowCarb Taco (Meringue) Pie

When I was growing up and spent summers with my grandparents, one of my favorite dishes my grandmother made was Taco Casserole—which was basically taco meat, Fritos corn chips, and cheese. Lots and lots of cheese.

Well . . . I can’t have the Fritos anymore, so I’ve been looking for a good low-carb substitution for this favorite from childhood. This one turned out okay, and will be even better with some tweaks (at the end—and you’ll see why I mentioned “meringue” in the title).

Low-Carb Taco Pie
(Click here for a printable PDF version of this recipe)
Low-Carb Taco Pie Ingredients | LowCarbKaye.comIngredients:

  • 1 pound ground beef
  • 3/4 cup water
  • 1 packet taco seasoning
  • 6 large eggs
  • 1 cup heavy cream
  • 1 teaspoon minced garlic
  • 1/2 teaspoon salt
  • 1/4 teaspoon black pepper
  • 1 cup shredded cheese, divided (3/4 and 1/4)—I used 4-cheese Mexican Blend, but Cheddar or Jack or whatever cheese you like would work
  • Optional (be sure to add the carb count for these):
    Sour Cream
    Salsa
    Avocado slices/Guacamole

Tools and Utensils:

  • Deep skillet (for cooking taco meat)
  • Plastic storage container or zip-top bag (big enough to hold cooked taco meat)
  • Cooking spray (I used Olive Oil spray)
  • 9-inch glass pie plate
  • Measuring cup/spoons
  • Large bowl
  • Whisk

Instructions:
During your weekend prep time, or the evening before, make the taco meat. Brown one pound of ground beef (or whatever ground meat you prefer) in a tall-sided skillet over medium to medium-high heat. As soon as the meat is cooked through, drain off as much grease as possible and return meat to pan. Add the water and bring to a simmer. Add seasoning from packet and stir until well combined. Reduce heat and cook until sauce is slightly thickened. Let meat cool, then place in a plastic bag or container and store in the fridge until ready to assemble the “pie.”

Preheat oven to 350°F. Lightly grease pie plate and set aside. In a large bowl, combine eggs, cream, garlic, salt, and pepper and whisk until well combined.

Original Recipe: Spread taco meat in the bottom of the pie plate. Pour egg mixture over. Top with shredded cheese. Bake 30 minutes or until center is set (it doesn’t jiggle anymore) and cheese is golden brown. Let sit five minutes before slicing into quarters or eighths and serving.

Serves 4 (2 slices each) as a main dish, 8 as a side dish. Each “slice of pie” has 2g net carbs.

Low-Carb Taco (Meringue) Pie | LowCarbKaye.com

The way this cooked up turned out to be something akin to a taco-meringue pie—all the meat loose and falling apart at the bottom and all the egg mixture cooked together on the top. Maybe if the meat was hot when the egg mixture is poured over, the eggs would seep down into it better to hold it together. But I doubt it, since the hot meat would immediately start cooking the eggs. Here’s what I plan to do differently next time:

Changes I Plan to Make: Precook taco meat and chill until ready to assemble, as outlined above. Combine all ingredients (egg mixture plus taco meat plus 3/4 cup of cheese) and pour into greased pie plate. Bake as instructed above. Five minutes before removing from oven, sprinkle remaining 1/4 cup of cheese on top and bake until it’s melted/center of pie is set.

Posted in Food Journal, Low-Carb, My Wholesome 30, Recipes | 1 Comment

#MyWholesome30 — Let’s Try This Again

So, as you probably guessed, I didn’t make it all the way to the end of the thirty days before giving up on the “Wholesome Eating” challenge I started in August. I did pretty well for a few weeks . . . and then, as I mentioned before, rather than improving on a cleaner diet, my psoriasis on my hands and feet continued to get worse.

Before I had my doctor appointments on September 3 and 4 (after having to push them back almost two months because of changing jobs and thus insurance), my feet were so bad that I could barely walk, even when all of the places where there were splits and cracks (i.e., the equivalent of deep lacerations) were bandaged and taped—and because of favoring one foot or the other (or both), it threw my knees, hips, and back out of alignment so that all of those were constantly painful as well. Plus there was a lot of swelling in my ankles and knees, making any movement even more painful. My hands (with the psoriasis now spread up to the tips of my fingers) were swollen, stiff, cracked, etc., to the point that I could barely grasp anything (fingers swollen/stiff/not working right) and when I did, it was painful because of all of the splits/lesions.

The best way I can describe it is this: Imagine wearing a pair of extremely stiff, extremely rough wool gloves that not only itch but feel like they’re rubbing your skin raw. Then imagine that there are tiny shards of broken glass embedded in the fingertips and palms creating random cuts all over. That’s what it felt like.

So aside from not being able to stand up or move around the kitchen to cook, I couldn’t even do any kind of prep work. And convenience foods are notorious for not being all that nutritious.

At the appointment with my dermatologist on September 4, I started on a new medication for my psoriasis—this time, he recommended I try Otezla, which is a daily pill rather than a weekly self-administered injection (yay!) and which isn’t an immunosuppressor (YAY!) like the Enbrel I’d been on for eight months with little improvement to show for having to be on heavy-duty antibiotics three times in the first six months of this year.

That was two weeks ago. Here’s a before-and-after photo of the improvement I’ve had in just two weeks. I don’t think I was actually supposed to improve this much this quickly. But I’m most definitely not complaining!!! (Now if I can just get my insurance company to agree to approve the prescription so that I can continue with the treatment beyond the one-month’s worth of sample product I have.)

So now that I can not only use my hands and stand (and walk and exercise!) again, it’s once again time to start getting my eating back in order. (Especially since, even after three successful weeks doing this before my regular doctor appointment, my A1C—long-term blood-sugar level—was still at 6.3, which is about 0.3 over the “diabetes” line. I have been able to successfully get it down under the line with diet and exercise before, so that’s my focus now.)

Food Inventory
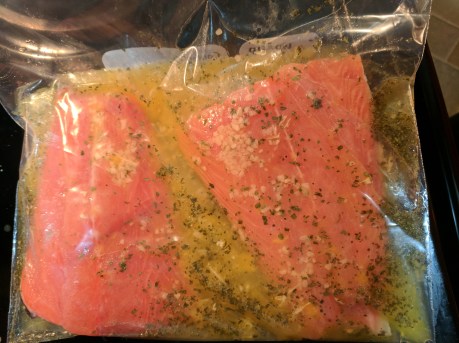
I’ll be starting a new 30-day round of My Wholesome 30 on Monday. As a reminder, this is my low-carb, dairy-inclusive version of Whole 30, aimed at feeling better, having more energy, and getting that blood-sugar level back down to the non-diabetic range (and getting my blood pressure down would be great, too.)

So this weekend is devoted to preparing and planning. And I’ve already started by starting an inventory of all of the MW30-appropriate foods I have in the house (after a big shop yesterday in which I bought lots of fresh veggies along with some fruits and proteins/quick proteins) to make planning easier.

I do have some recipes that I made last time that I never posted, so I hope to get those up soon.

Posted in Food Journal, Low-Carb, My Wholesome 30 | 3 Comments

Marinated Lamb Shoulder Chop and Roasted Cauliflower

It used to be that lamb was one of those meats that almost no one ever served, except for maybe on Easter, and that you didn’t see on restaurant menus unless you were at a Greek, Mediterranean, or Middle Eastern style restaurant.

Now, even though it’s not always easy to find, it’s almost the same price per pound—and possibly less—than beef. I like to get the shoulder chop because it’s always more affordable than lamb chops or the big roasts—and, just like beef steaks or pork chops, one shoulder chop is the perfect size for one serving. Something to bear in mind, with the way these are cut, they usually have two bones running through them, and sometimes the ends of the bones are somewhat sharp. So be careful when eating!

Marinated Lamb Shoulder Chop
Usually, I go for Greek/Mediterranean flavors when cooking lamb. But this time, I decided I wanted to try something a little different:

Orange-Lime Marinade Recipe | LowCarbKaye.com

And I think I might actually like this even more with lamb than I did with the pork!

Roasted Cauliflower
There isn’t much that’s easier than roasting veggies. I didn’t have any fresh cauliflower, but this worked just fine using frozen.

  • 1 bag frozen cauliflower florets
  • olive oil
  • salt
  • parmesan cheese

When I put the lamb in the fridge to marinate, I took the bag of cauliflower out of the freezer, dumped the frozen florets into a strainer, and set it in the sink. By the time I was ready to make dinner, the cauliflower were frozen and drained and relatively dry.

I tossed the cauliflower with olive oil and salt in the baking dish (8×8 or 9×9 should suffice), then sprinkled with parmesan cheese before placing in a 450°F oven for about 15 minutes. You can see that they didn’t get overly brown. But I didn’t want to cook them as long as I would have done with fresh cauliflower, because the frozen stuff cooks through and turns to mush a lot faster.

Lamb Shoulder Chop and Roasted Cauliflower | LowCarbKaye.com

And, yes, I’m experimenting with trying to take better food photos. No, I’m still not very good at it.

Posted in Food Journal, Grocery Store Finds, Journal, Low-Carb, My Wholesome 30, Recipes | 1 Comment